
Building EdgeApp
Building for the CTEC Target
-
Extract the SDK contents.
Linux: tar -xvf CTEA_SDK-.tar.gz
Windows: Use Windows tools to unzip CTEA_SDK-.zip -
Change directories to the SDK root.
cd CTEA -
Create a build directory.
mkdir debug -
Move to the build directory.
cd debug -
Create the build environment.
Linux: cmake -DCMAKE_BUILD_TYPE=Debug -DCMAKE_TOOLCHAIN_FILE=../Toolchain-arm-oe-linux-gnueabi.cmake ..
Windows: cmake -G "Unix Makefiles" -DCMAKE_TOOLCHAIN_FILE=../Toolchain-armv7m-none-eabi.cmake .. -
Customize EdgeApp.
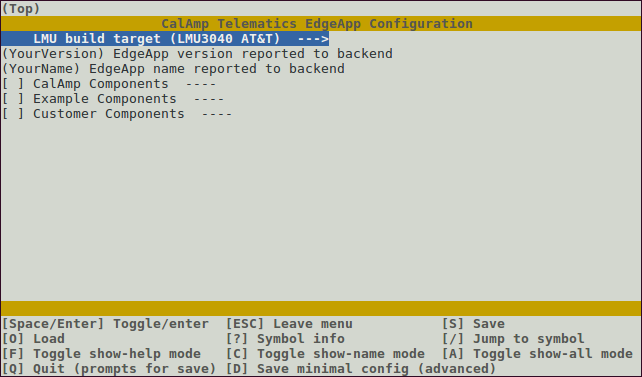
make menuconfig
-
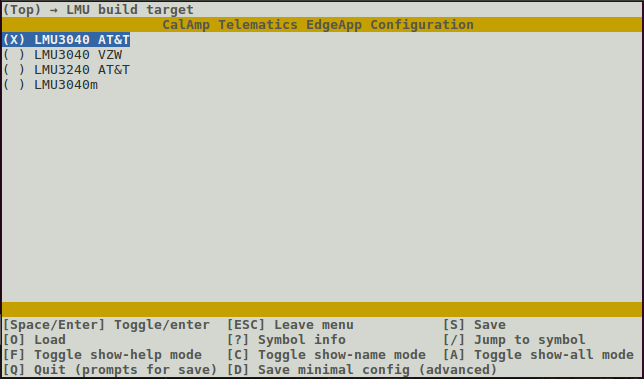
Select the LMU build target by pressing Space Bar or Enter when “LMU build target” is selected. Use the arrow keys to select the appropriate device and press Enter to select the build target and return. Note that LMU3040 and LMU3240 will not build in a Windows environment and LMU3040m will not build in a Linux environment.
-
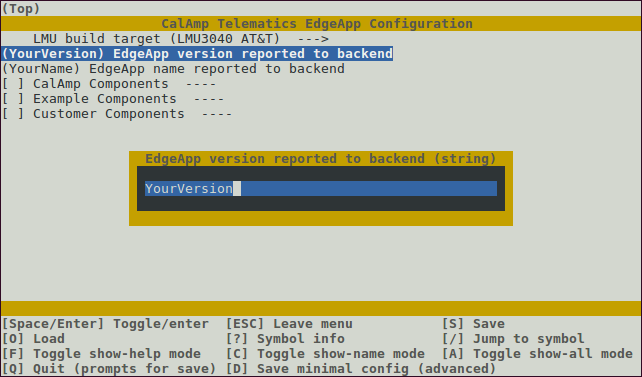
Use the arrow keys to highlight “EdgeApp version…” and press Enter. Type an appropriate version up to seven characters and press Enter.
-
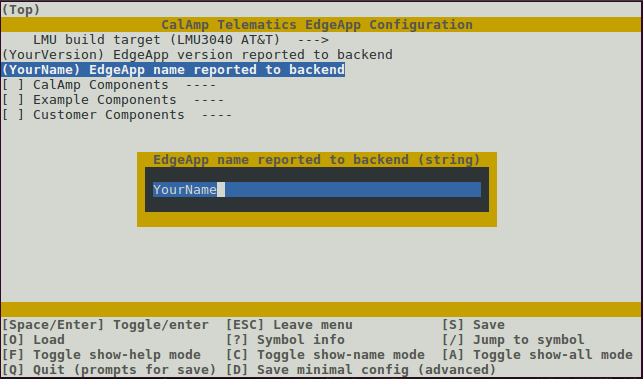
Use the arrow keys to highlight “EdgeApp name…” and press Enter. Enter an appropriate EdgeApp name up to 15 characters.
-
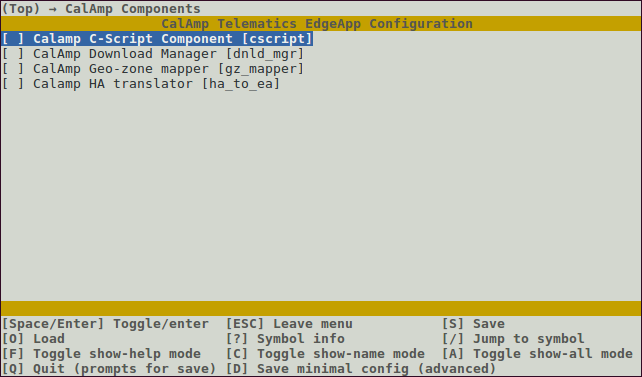
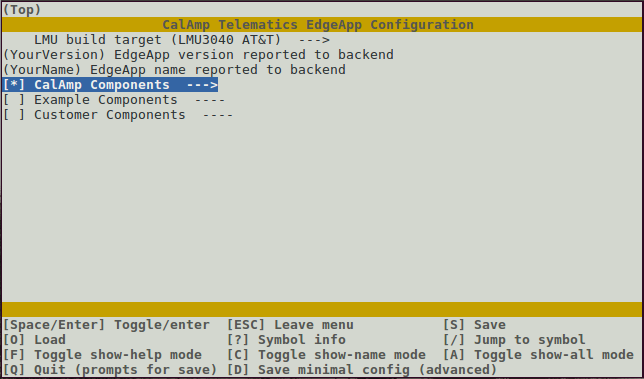
Use the arrow keys to highlight “CalAmp Components”. Press Enter twice to select this group and display available CalAmp components. Select or deselect desired components.
-
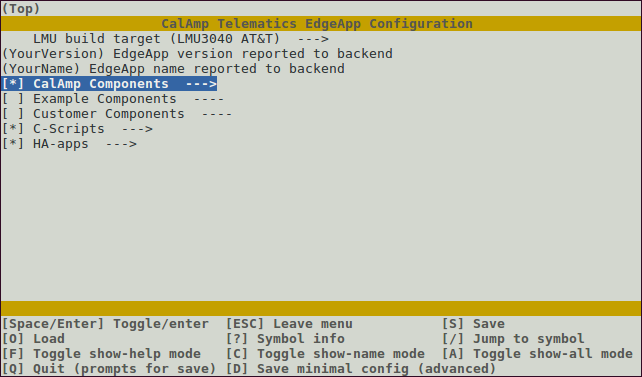
Press Esc to exit the CalAmp Components menu. Note that if the C-Script or HA translator components are selected, additional menus become available in the main menu.
-
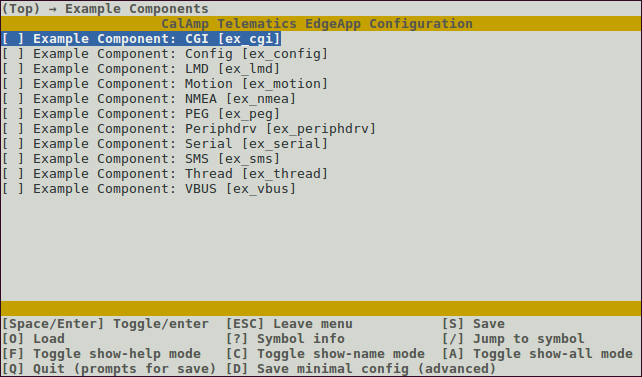
Use the arrow keys to highlight “Example Components”. Press Enter twice to select this group and view the available components. Select or deselect components as needed.
-
Press Esc to exit the Example Components menu.
-
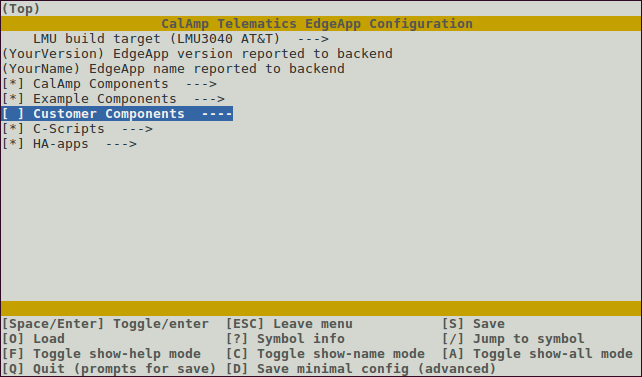
Use the arrow keys to highlight “Customer Components”. Press Enter twice to select this group and view the available components. Note that by default there are no customer components created and group won’t open. Once a customer component is created, this menu will open.
-
Press Esc to exit the Customer Components menu.
-
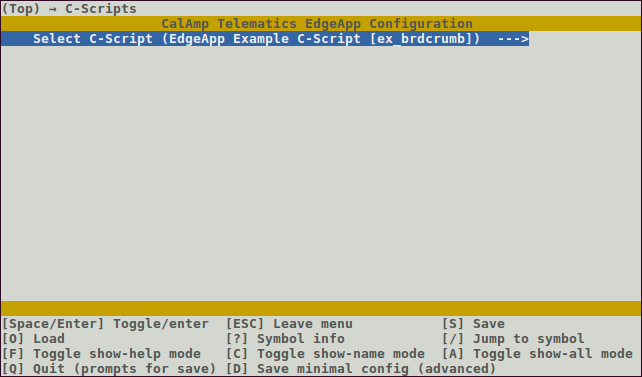
If the C-Script CalAmp component was selected, use the arrow keys to highlight “C-Scripts”. Press enter once to display the currently selected C-Script.
-
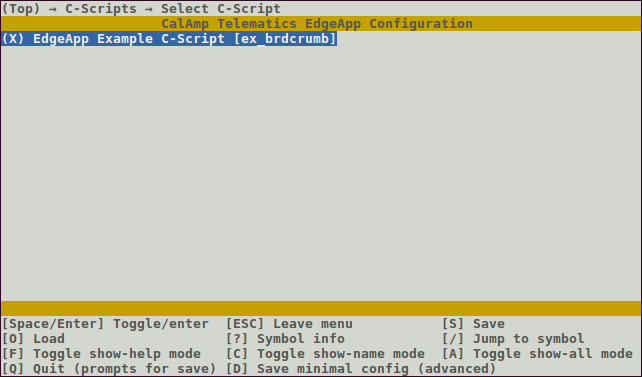
Press enter a second time to display all available scripts. Use the arrow keys to select the appropriate script and press Enter. Note that only one script may be selected.
-
Press Esc to return to exit the C-Scripts menu.
-
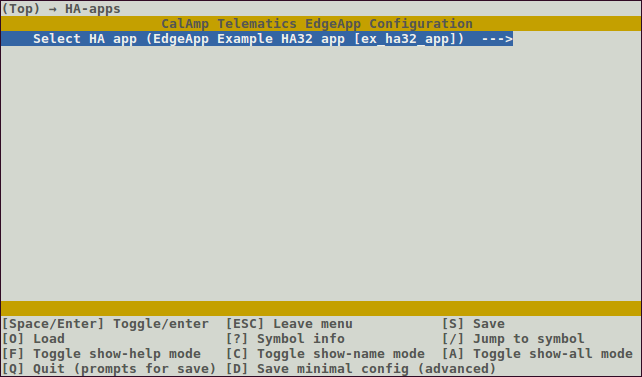
If the HA Translator CalAmp component was selected, use the arrow keys to select “HA-Apps”. Press enter once to display the currently selected HA App.
-
Press ‘q' to quit and, when prompted, 'Y’ to save configuration.
-
Compile the EdgeApp.
make -
Generate the final binary image.
make image
Creating a New Component -
Move to the template directory.
cd source/components/src/cust_comp/template -
Create a new component from the template.
Linux: ./create_new_comp.sh <some_cmp>
Windows: create_new_comp.sh <some_cmp> -
Change directories to the new component root.
cd ../src/cust_comp/<some_cmp> -
Get a license file from Customer Support.
-
Put the license file in the include directory of the new component.
-
Edit the Kconfig file and update the full, default name in the second line, if desired.
vi ./Kconfig -
Refer to “Building for the CTEC Target” for steps on building in the new component.
Creating a New C-Script -
Move to the template directory.
cd source/externals/src/csript/cust_cscript/template -
Create a new C-Script from the template.
./create_new_cscript.sh <new_name> -
Move to the debug directory.
cd ../../../../../../debug -
Start menuconfig.
make menuconfig -
Use the arrow keys to select CalAmp Components and press Enter twice.
-
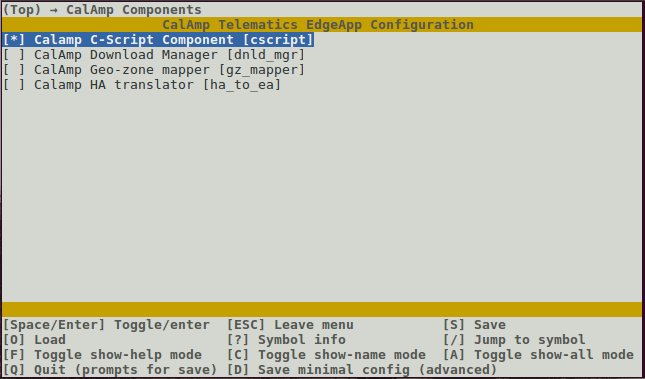
Use the arrow keys to select the CalAmp C-Script Component and press Enter.
-
Press Esc to exit the CalAmp Components menu.
-
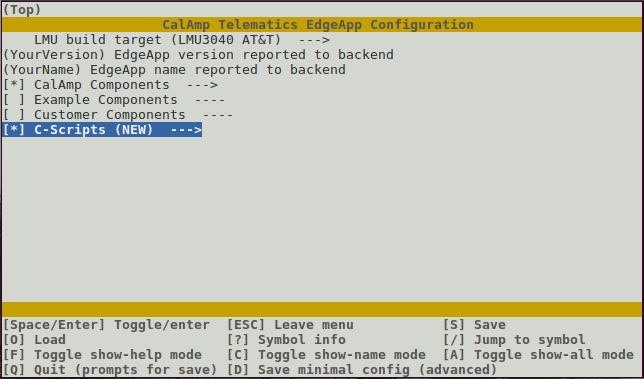
Use the arrow keys to select C-Scripts and press Enter twice.
-
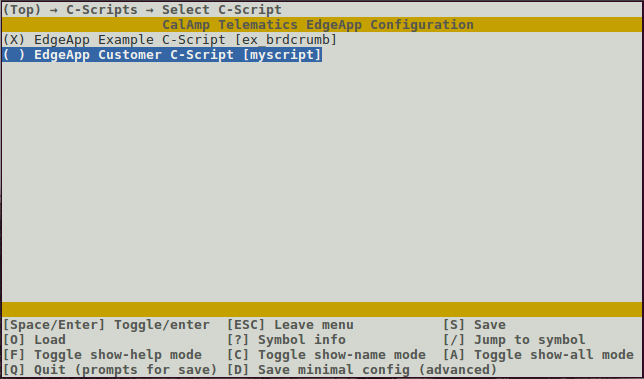
Use the arrow keys to select the new C-Script and press Enter. In this example, the “new” script is called myscript.
-
Press ‘q' to quit and, when prompted, 'Y’ to save configuration.
-
Compile the EdgeApp.
make
Adding a 32-bit Hosted App -
Move to the ha32_app directory.
cd source/externals/src/ha32_app -
Copy the 32-bit Hosted App folder into the ha32_app.
-
Run the integrate_ha script using the folder name of the 32-bit Hosted App that was just copied.
./integrate_ha <folder_name> -
Move to the debug directory.
cd ../../../../debug -
Start menuconfig.
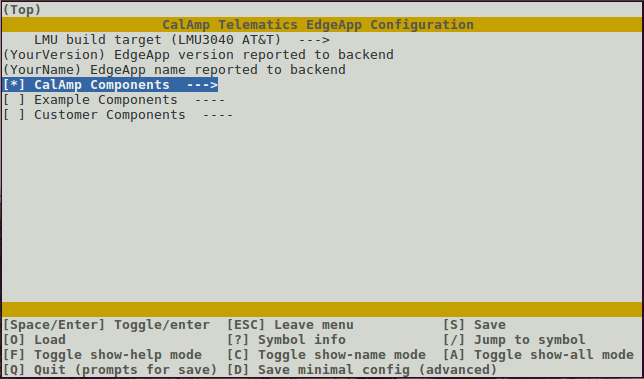
make menuconfig
-
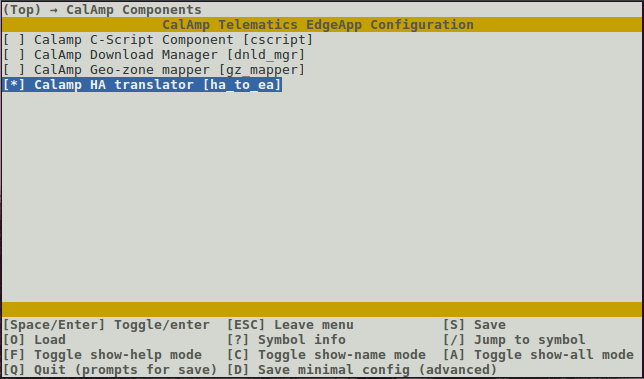
Use the arrow keys to select the CalAmp HA Translator.
-
Press Esc to exit the CalAmp Components menu.
-
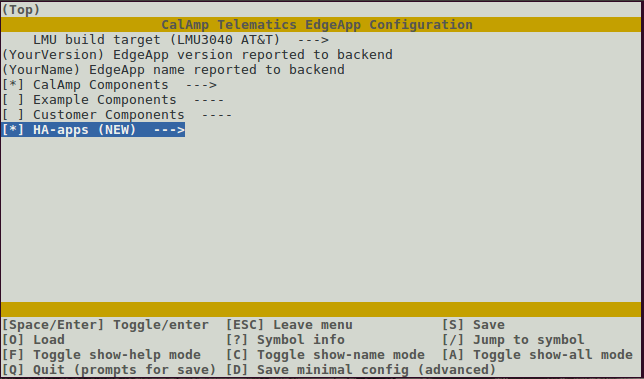
Use the arrow keys to select HA-apps and press Enter twice.
-
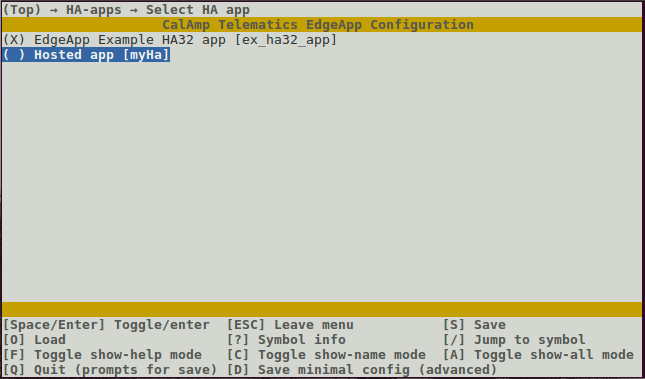
Use the arrow keys to select the new Hosted app and press Enter. In this example, the “new” Hosted App is called myHa.
-
Press ‘q' to quit and, when prompted, 'Y’ to save configuration.
-
Compile the EdgeApp.
make
Running Clang Static Analyzer (Linux only)
-
Change directories to the SDK root.
cd CTEA -
Create a debug directory.
mkdir debug -
Move to the debug directory.
cd debug -
Create the build environment
cmake -DCMAKE_BUILD_TYPE=Debug -DCMAKE_TOOLCHAIN_FILE=../Toolchain-arm-oe-linux-gnueabi.cmake .. -
Select components for static analysis.
make menuconfig -
Move to SDK root directory.
cd .. -
Create a static build directory.
mkdir static_debug -
Copy component selections.
cp debug/.config static_debug/ -
Move to the build directory.
cd static_debug -
Create the build environment.
scan-build-6.0 cmake -DRUN_CLANG_STATIC_ANALYZER=1 -DAPP_ID=1001 -DCMAKE_BUILD_TYPE=Debug -DCMAKE_TOOLCHAIN_FILE=../Toolchain-arm-oe-linux-gnueabi.cmake .. -
Run the static analyzer.
scan-build-6.0 -o scan_build -enable-checker alpha -disable-checker alpha.clone.CloneChecker --keep-going --use-cc=/usr/local/oecore-x86_64/sysroots/x86_64-oesdk-linux/usr/bin/arm-oe-linux-gnueabi/arm-oe-linux-gnueabi-gcc --use-c++=/usr/local/oecore-x86_64/sysroots/x86_64-oesdk-linux/usr/bin/arm-oe-linux-gnueabi/arm-oe-linux-gnueabi-g++ make_
Formatting the Source Code with Astyle
-
Change directories to the debug directory
cd debug -
Format the source code
make astyle
Creating Documentation with Doxygen
-
Change directories to the debug directory
cd debug -
Generate documentation for custom components
make doc
Sideload EdgeApp to Linux Target -
Change directories to the debug directory
cd debug -
Deploy image to target and install
make deploy -
When prompted (twice), enter the password
welcome123
Sideload EdgeApp to RTOS Target -
Open a TeraTerm (or other terminal program) session to the USB Serial Port for the LMU3040m.
-
If required, enter the device password.
at$pw <device_password> -
Enter the download command.
at$app fdnldser -
From the TeraTerm File menu, select Transfer, YMODEM, then Send…
-
Browse to select the EdgeApp image.
-
After the download is complete, program the image.
at$app frog 3 0 -
To start the EdgeApp, reset the device.
atreset
Updated about 2 months ago